So sorry I have been M.I.A. for what feels like the longest time. Sickness hit our home. I can assure you I am back on the wagon as of this evening. (Even though the bug has seemingly found my baby girl this evening :( )
I just wanted to assure all that I haven't abandoned creating already! Just one crazy week! I need my creative therapy though, so I'm back at it!
Courtney
Saturday, February 26, 2011
Saturday, February 19, 2011
No Sew Printed Onesie

Here is what you'll need (Note: This tutorial is only for the name. The added applique can be done following the "OWLplique" Tutorial.

Acrylic Fabric Paint
Scissors
Paper and pencil
Cutting blade
Onesie or shirt
Cutting board (or any surface that you can cut on with the blade)
Iron
Sponge Brush
First draw out the name and trace it onto the matte side of the freezer paper.

Once you cut out the inside of the letters (and be sure to save the little circles from like the inside of the D and the inside of the E. You'll need to iron those on.)

 | |
| Sorry this is upside down. |
Now Apply the paint slowly with the sponge brush. Be careful not to go over the edges of the paper. Not too thick, but don't leave white showing.


Other examples of shirts I have done can be found on Facebook at
Evelyn's Closet : Custom Tutus, Bow, and more.
Enjoy personalizing!
Court
Friday, February 18, 2011
No Machine "OWLplique" under $10 again!


Heat&Bond. Comes in a roll. If your Walmart has a sewing department they sell it.
Pellon 808 Craft Fuse backing
Scisors, Thread (white,black, and your 3 colors. I'd recommend a basic little sewing kit. No need for 5 full spools.)
Iron, pencil, and paper.
The felt, heat&bond,a onesie or shirt, and pellon can all be purchased for under $10 making this another super thrifty way to spice up your child's wardrobe without ever paying overpriced boutique prices.
So I had already cut the wing off of my design before the photo. I'll take this time to remind you not to freak out if things don't go exactly like you wanted when making things. Just push through. You might like the end product better than what you had imagined.

With this type of design you'll need to cut out each piece so you can iron them all onto their respective colors. Next peal off the paper back and place it on the item you are appliqueing on.


Thread your needle. I use a strand of thread in half so I have 2 lines going through the needle because I want my stitching to really show up.


Once everything is stitched on I always carefully trim the excess backing from around the edges. I don't usually "tear" it away because I don't want it pulling my thread.
And there you have an easy cute OWLplique without needing a sewing machine.
- Court
Thursday Is My Monday?
It always seems like Thursdays are my busiest days. So much for a tutorial yesterday. With husband out of town and parents in need of furniture moving help, the kids and I didn't make it home until 8p.m. I did come across 2 awesome ideas that my Grandmother sent me from a magazine. Can't wait to try them for you! Felt OWLplique tonight? I think so! Also watch for the first video this weekend!
Happy Friday.
Happy Friday.
Wednesday, February 16, 2011
Fun Flirty Skirt
 |
| Please ignore my cookie jar. My daughter won't stand still! :) |

Again this is for 18mos. - 2T. Adjust your measurements accordingly.
- 3 different fabrics. I spent about $7 total at JoAnne's Fabric.
- waistband strip is 4 x 39in
- middle section is 6 x 33in
- bottom section is 6 x 33in
- Tulle
- 5 - 6 x 33 inch strips
- 1.5in Elastic Band 16in long (Walmart sells this by the spool (25 yards I think) for $2.
- Scissors, Thread in the color of your choice, pins, sewing machine.


Stitch all the way across. Be sure to stay close to your edge to leave enough room for the elastic inside. I use a zig zag stitch and go over once more with a straight stitch.
Next flip inside out and iron out flat with the seam at the bottom. Lay on face side of middle section with seam of waistband at the edge of the mid section. Pin into place. I made mine with box pleats.
 |
| See the seam of the waistband is at the edge of the face side of the mid section. |
 |
| again with a zig zag stitch and straight stitch over... this is how it will look once stitched. |
 | |
| How it looks when you flip it up. |
Take a moment to insert the waistband. I use a hard plastic straw. I lay the band tip over it and send a straight pin down through it into the top of the straw. Now I can shove the elastic through. Be sure to pin or stitch the beginning end in place so it doesn't pull all the way through. Then stitch both ends into place at the edge of the waistband fabric... don't sew the ends to one another.
Now on to adding the tulle and the bottom section all at once.
First cut the tulle strips so that you have 10 - 3 x 33 inch strips and place all in a stack. Fold in half and stitch up the fold with a single straight stitch.

Lay aside and find your bottom section. If it has a print or a face side make sure you fold it in half with the face side OUT. Straight stitch all the way across.
Now you will lay the tulle piece and the bottom section upside down on the mid section and pin into place.
 | |
| This is the opposite end of the mid section from the waistband. You want the seams to be against this end. |
Stitch all together with the zig zag followed over by the straight.

Now fold entire skirt in half to sew up the back seam. Since multiple prints are being used it is very important that all of your cuts are even, and that you pin the sides to match up.

Zig Zag and straight down the edge.
Flip inside out and WEAR!
For less than $10 you have a trendy boutique flirty skirt.
Happy Thrifty Crafting
Court
Coming up this week: Committed to crafting and posting!
I have some great tutorials coming up this week, though with two children in the house it isn't always easy to find the time to work on my projects. This is why I try to stick with projects that don't take more than a couple of hours. I like to see a finished product, and I only have a limited amount of "nap time" to work with. For the times when my son won't work I have provided him with an "office" of his own.


We will be working on a Smock next week, but for now he just wore one of my old T-Shirts. He loved being able to wipe his hands on his shirt.
So what is to come you ask? Here is the line-up for the rest of this week:
Wednesday - Printed Party Skirt (20 minutes tops/pattern free)
Thursday - Appliqued Onesie (I'm not going to describe this one. Just imagine the possibilities and be excited!! 1 hour tops and as cheap as $5)
Friday - "Mini" Minnie - Tutu and Ears (Get a head start on your Vacation, Birthday, or Halloween with this adorable costume! 1 hour to finish and no more than $20 spent)
Now I'm off to peanut butter and jelly, play taxi cab for my 3 year old, and settle my little loves in for their afternoon naps! Then it's Tutorial TIME!
Tuesday, February 15, 2011
The Ten Minute Dress Tutorial

I love a cute dress, and now that I am a mother of a spunky little girl, I LOVE for her to have cute every day dresses that are multi-functional. This adorable dress is great for everyday wear, as well as cute photos or special occasions. You can dress it up or down (pun intended) any way you like. The best part is that the fabric you'll use for this dress does all of the work for you. I made my dress in a 3T - 4T
Here is what you'll need:

- smocked fabric of your choice. I used 22 inches of black with white polka dots from Hobby Lobby. It was around $13 a yard, but with their regular 40% off any single item I saved over five dollars.
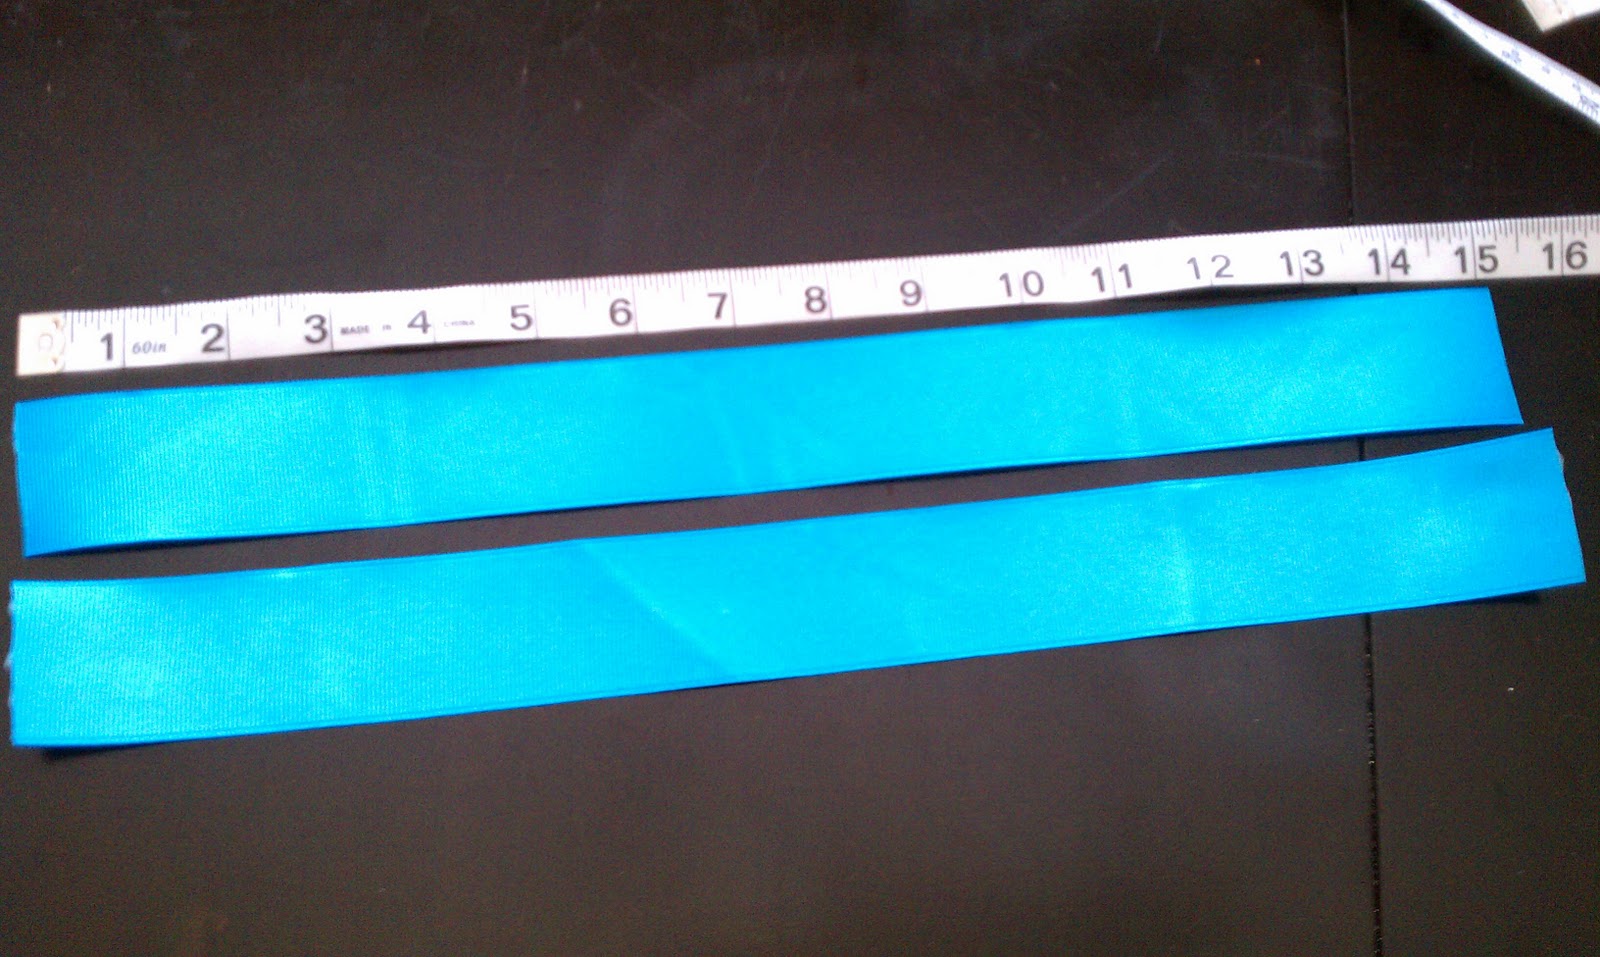
- 1.5 inch ribbon. I used 65 inches of bright blue that I also bought on sale at Hobby Lobby for less than a dollar.
- Sewing machine with matching thread and bobbin thread. (Thread should match the dress for the straps and either the ribbon or the dress for the bottom, but I did black on the bottom ribbon to add a little flare and to save $ on not needing 2 spools of thread.
- Scissors
- Pins
- Sewing Machine I use a Janome DC2010. It is a relatively inexpensive machine and very user friendly.
First if you bought more than the desired amount of fabric cut it to the size you need. I made a 3T-4T and needed 22 inches, but I also measured for a 2T and also needed 22 inches. The only difference is that when I made the smaller one I cut the length off to be appropriate. Remember to compensate for the extra inch and a half you will add with the ribbon.
Pin the ribbon onto the outside of the bottom of the fabric. Remember to point the pins in the proper direction so that you can remove them as you sew.
 | |
| Please note that my pins are not in fact facing the correct direction. I had to move them. ha! |
Make sure you have your ribbon straight across the bottom and place under your machine. I recommend moving slow since this is a visible stitch and you will want it to be very straight.

 | |
| pins now facing proper direction. :) |
I did a single straight stitch across the bottom watching carefully to keep the dress lined up so that the stitch stays the same distance from the top of the ribbon all the way across.

Next step is to sew up the dress in the back. Join the two ends of the fabric and line them up making the dress inside out. Note: It is important to be certain that the machine doesn't move the dress out of line because you want the ribbon to meet up at the bottom. If you sew too fast and don't pin then you may end up with one side of the ribbon sitting higher than the other.
 |
| I did burn the edges of all of my ribbons, but you can also buy Sprayaway 821 No Fray Spray on Amazon |

 |
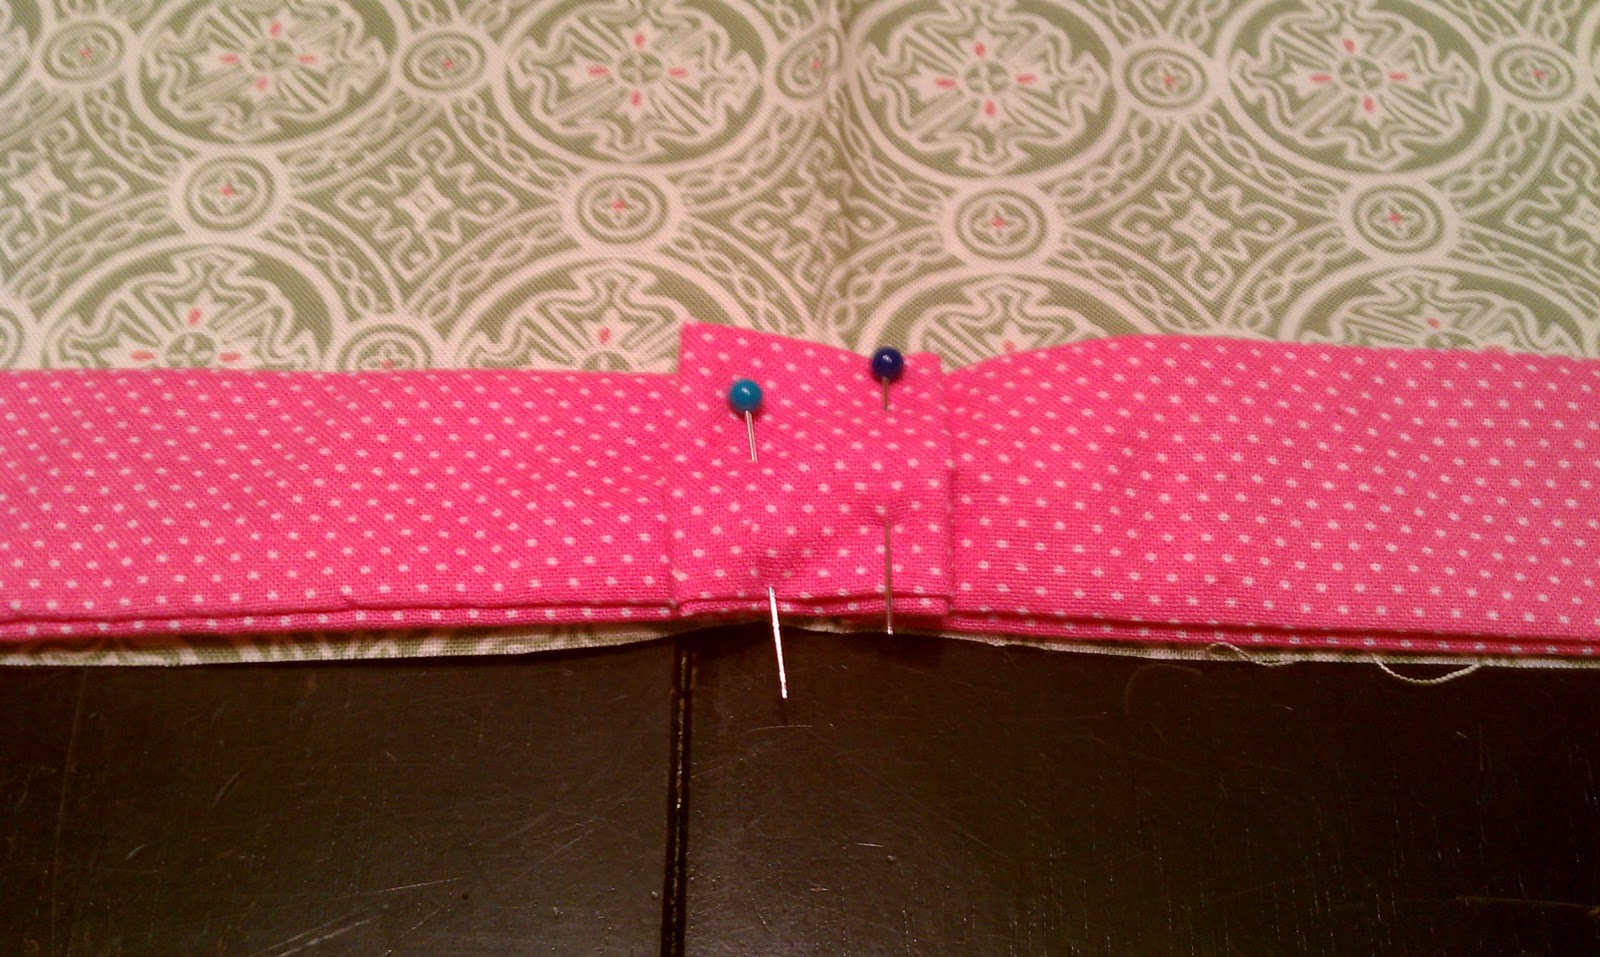
| When preparing for straps be sure the seam is up the back middle of the dress. |
Next is the straps. For mine I needed 2 - 15 inch strips of ribbon. I got that length by measuring from where I wanted the strap to be on the front of her chest and then over the shoulder and across her back to where I wanted it to stop. Pin the ribbon onto the inside of the front of the dress and stitch into place. I use a ziz zag stitch for strength and then go over it with a straight stitch. (note that if your bobbin thread does not match it will show) Do the same for the other strap and remember when stitching to the INSIDE of the back to cross over to the opposite side with each strap.

All said and done you have an adorable so easy its shocking dress for no more than $10 and no more than 10 minutes!

Who is ready for Spring? This girl!
happy thrifty crafting,
Courtney
Subscribe to:
Posts (Atom)